


You’ve just put on your new Samelin boots and are waiting for the first snow, but you already know that winter rain can seep through if they’re not properly treated. That itchy, damp feeling on your feet is no coincidence – it’s a sign that the leather is lacking water protection.
That’s why we often get asked: “how to waterproof leather boots for winter without a membrane?” I’ve seen both beginners and experienced outdoor enthusiasts make mistakes that quickly cause their boots to lose their warmth. But don’t worry, we can figure it out together.
First and foremost, choose the right waterproofing product. A wax-based spray specifically formulated for full-grain leather will provide the best water repellency without blocking the material’s breathability. Avoid silicone-based products – they can stiffen the leather and reduce grip on icy trails.
Here is a simple step-by-step checklist you can follow before setting off on a winter adventure:
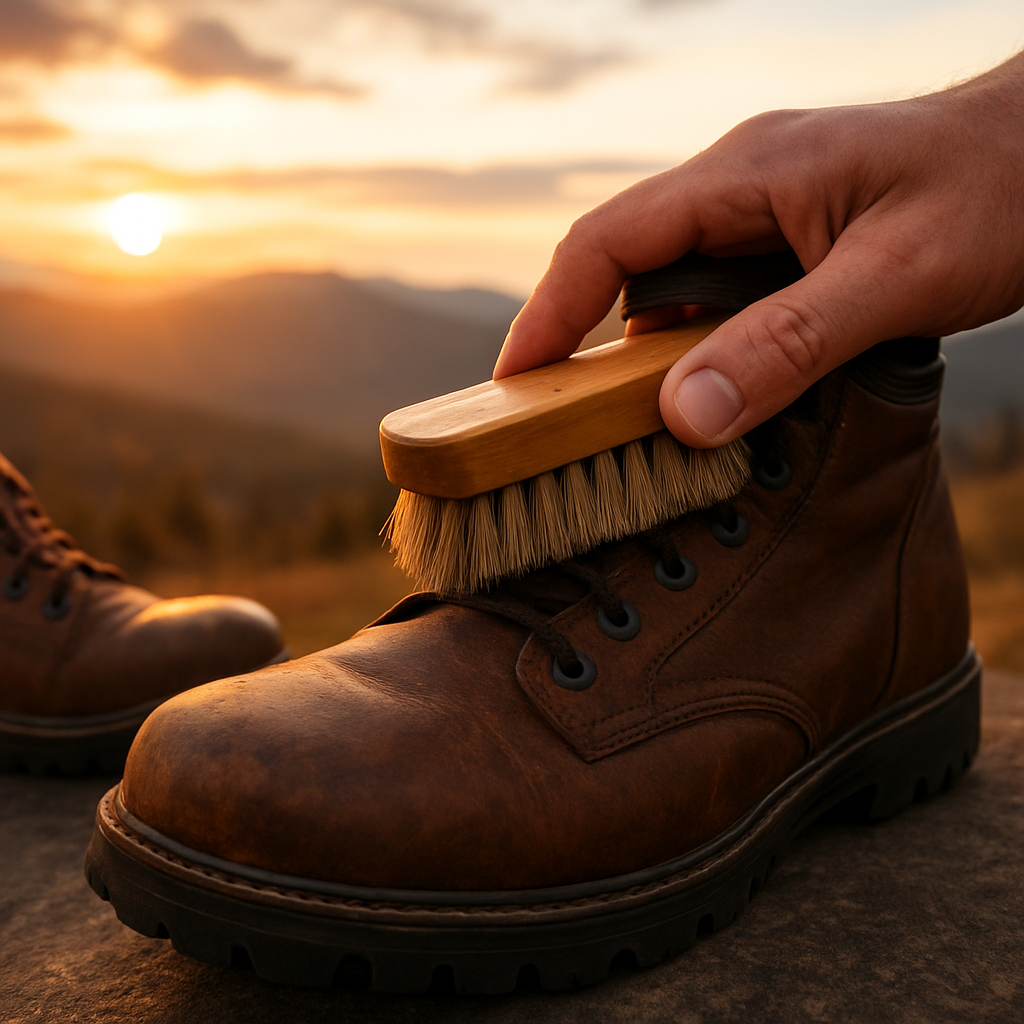
- Clean the boots with a soft brush and a mild leather care product. Let them dry completely, preferably in the shade.
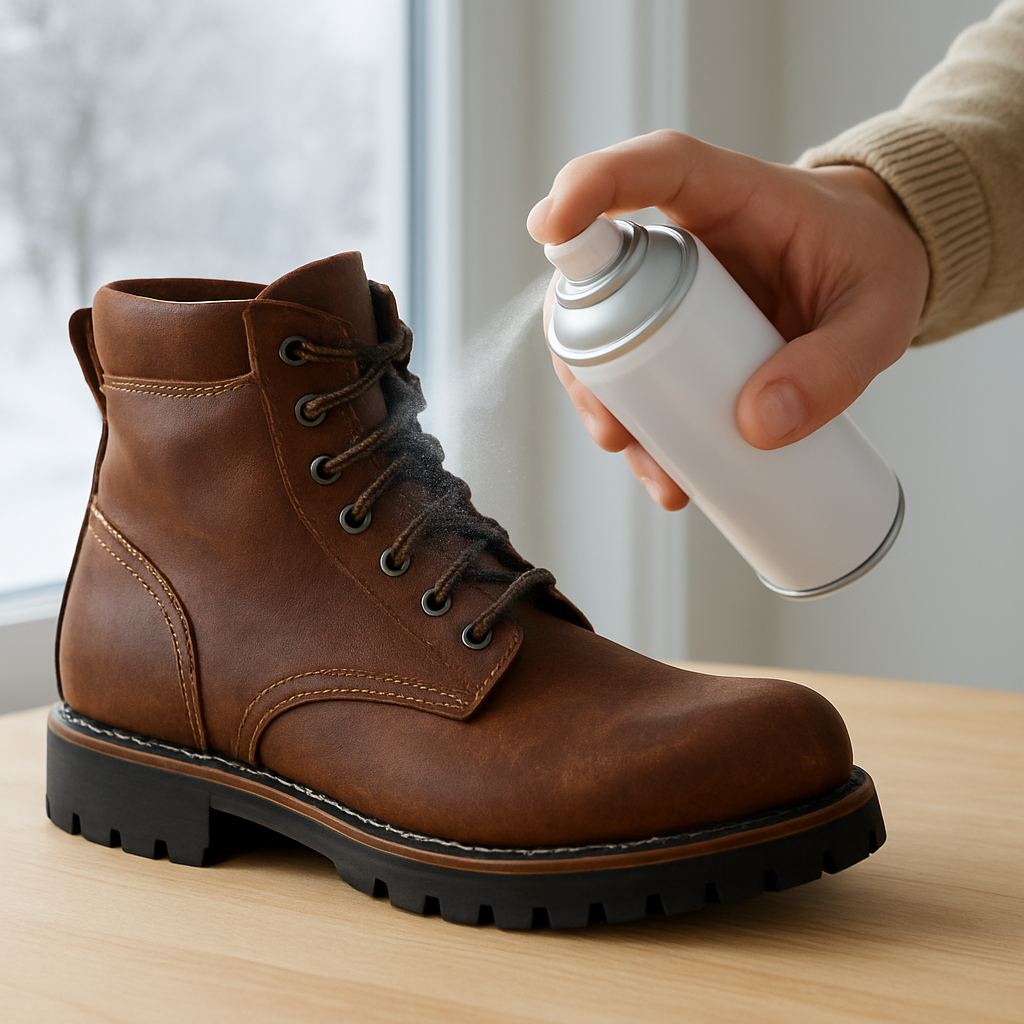
- Apply a thin layer of impregnation spray in even strokes, holding the bottle about 20 cm from the surface.
- Let the product sit for 10-15 minutes, then wipe off the excess with a clean cloth.
- Repeat the process every three to five weeks, or more often if you are out in wet snow every day.
A common misconception is that you can skip the drying step and go straight out into the cold. In fact, moisture that hasn’t had time to set can lead to mold and bad odors. I remember a friend who used an old wax product on his M77 boots and had them “stick” to every rock. After a thorough cleaning and proper impregnation, the problem was solved.
If you're unsure which product is right for your boots, check out our step-by-step guide to impregnating leather . There you'll find both product recommendations and common pitfalls to avoid.
So, when the snow starts falling and you see tracks in the softpack, you know exactly what to do to keep your feet dry and warm – without compromising the flexibility of your boots.
tl;dr
Waterproofing leather boots for winter without a membrane is all about proper cleaning, thin coats of waterproof spray and thorough drying before heading out into the cold. Follow our simple checklist, let the product sit for ten minutes and repeat every three to five weeks for lasting warmth and dry feet all season long.
Step 1: Clean the boots thoroughly
Before you even think about impregnation, the most important step is to remove all dirt, dust and old wax film. Think of it like washing a bicycle frame before painting – if the surface is dirty, nothing new will stick properly.
The first thing you do is brush off any loose dust with a soft leather brush. Go carefully over the seams and around the sole of the shoe, where dirt often hides. If you’ve been walking in snow or rain, you may see small grains of soil on the surface of the leather – a clear indicator that you need a deeper step.
Step 1-2: Choose the right cleaning agent
We recommend a mild leather care product without alcohol. Alcohol can dry out the leather and make it brittle, which is exactly what you want to avoid when you are going to impregnate it later. Pour a small amount onto a soft cloth and work it into the leather using circular movements. It feels like a light massage for your boots.
If you notice a stubborn stain, let the product sit for 5-10 minutes and then wipe with a clean, damp cloth. Avoid soaking the boots – too much liquid can seep into the glue joints and cause mold later.
Step 1-3: Dry thoroughly
After cleaning, let the boots dry in the shade, not in direct sunlight or near a radiator. A temperature of around 20°C and good air circulation is ideal. You can stuff newspaper or cotton balls into the shoes to absorb excess moisture.
It may sound like a long wait, but a thoroughly dried surface is the foundation for an even layer of impregnation. We have seen that when people skip this step, they often end up with puddles of water seeping in through the glue joints – leaving both cold feet and smelly boots.
So, how do you know if your boots are completely dry? Feel the leather – it should be soft but not cold or sticky. Another tip is to tap the sole lightly; if you hear a hollow sound, there is still air left and you should wait a little longer.
With a clean and dry surface, you’re now ready for the next step – applying a thin, even coat of waterproof spray. But before you go any further, let’s take a quick break and think about why a good cleaning is so critical for our winter boots.
Cleaning properly means you maintain the natural breathability of the leather. Full-grain leather, like our Samelin boots, wants to “breathe” so that moisture that collects inside can evaporate instead of creating mold. Once you’ve done this thorough job, the impregnation spray will adhere better and last longer.
One last reminder: do this cleaning session every three to five weeks during the winter season, or more often if you’re out in the rain or deep snow. It’s a little routine that will save you both time and money in the long run, and keep your feet dry as you hike through Swedish winter landscapes.
Once your boots have completely dried, store them in a breathable shoe box or a cloth bag with a small, lint-free silica gel sachet. Avoid plastic bags, which trap moisture and can lead to mold. This way, your boots will be ready for your next winter adventure when the snow starts to fall.
step 2: choose the right impregnation product
Now that the boots are clean and dry, it’s time to think about the impregnation itself. It feels a bit like standing in the kitchen and choosing the right spice – you want something that will protect without ruining the flavor.
What distinguishes the different products?
There are basically three main categories you will encounter in stores or online:
- Wax-based spray – provides a water-repellent layer but allows the leather to breathe. Perfect for full grain leathers like our Samelin M77 Winter boots .
- Oil-based treatment – penetrates deep into the pores and softens the leather. Good for older boots that have become stiff.
- Silicone-based product – creates a hard, almost plastic-like surface. We recommend staying away from this when you want to maintain grip on icy trails.
How do you choose the right one for your situation?
Consider three factors:
- Activity level – If you’re going to be walking long days in deep snow, prioritize breathability. Wax-based sprays are often best.
- Temperature – In extreme cold, a light oil-based product can help keep the leather flexible.
- Care habits – If you prefer to reapply frequently, choose a product that dries quickly and is easy to remove.
Practical comparison table
| Product | Water repellency | Breathability | Application |
|---|---|---|---|
| Wax-based spray | High | Good | Spray, let dry 10-15 minutes |
| Oil-based treatment | Medium | Limited | Massage in, leave on for 30 minutes. |
| Silicone-based | Very high | Poor | Spray, let cure 20-30 min. |
A common misconception is that more expensive always means better. I saw a friend who bought a premium silicone product for his children's boots - the result was that the children slipped on the ice because the surface became too smooth.
Instead, test a product on a small area first. Spray a corner of the sole and feel after 15 minutes. If it feels stiff, rinse with a damp cloth and try a different type.
Step by step: How to apply the right product
1. Read the instructions carefully. Some wax sprays require you to shake the bottle for 30 seconds to ensure the mixture is smooth.
2. Work in a well-ventilated room. You don't want to inhale too much spray, especially if you have allergies.
3. Hold the bottle about 20 cm from the surface. This will give an even layer without forming drops that can run down into the seams.
4. Apply in thin layers. It is better to have two light layers than one thick one which risks becoming sticky.
5. Leave for 10-15 minutes. The product will bond to the fibers but will still be flexible.
6. Wipe off excess. Use a clean, dry cloth to smooth out any spots.
Repeat the process every three to five weeks, or more often if you're out in wet snow every day. For families with children who often tread in muddy mud, a faster maintenance interval may be smart.
Expert tips from our field professionals
– Avoid spraying on cold leather. Low temperatures cause the product to solidify too quickly and form streaks.
– Test on a small area first. Even if the product is labeled for full grain, some treatments may react differently on worn leather.
– Remember the shoelaces. Spray them too – dirty laces can let in excess water.
Choosing the right waterproofing product is fundamentally about understanding your own winter style. Maybe you're a hunter who walks long distances in the snow, or a parent who's taking the kids on a shorter winter walk around town. Customize the product to your needs, test before you commit, and you'll have boots that keep your feet dry without losing grip.
step 3: apply the impregnation evenly
You've already cleaned and chosen the right product – now it's time to let it do its job without creating streaky stains.
Prepare the surface
Place the boots on a stable surface, preferably on an old newspaper or a plastic mat. This will prevent drips from running down the seams and make it easier to see where you have already sprayed.
If you have buttons or metal buckles, protect them with a piece of paper. A little protection can save you from stubborn residue that is difficult to remove later.
Spray technology
Hold the bottle about 20cm from the leather – not too close or it will create a thick layer that will quickly become sticky. An even sweep from the top to the sole in two directions will give the best coverage.
Make a long, smooth motion and only release the button when you have reached the end of your stroke. This way you avoid collecting too much liquid in one spot.
Repeat the same sweep on the opposite side, but start a little further down so that the overlap is minimal. It feels a bit like painting a window – you want a smooth result with no visible brush strokes.
Check the evenness
After the first pass, look carefully at the surface. Do you notice any spots that look darker? These indicate that the spray has collected in one place.
Take a clean, dry cloth and gently rub over these areas. A light dab is often enough to even out the difference without removing the protection completely.
If you are unsure, do a little “finger test”: press lightly with your finger on an area that looks even. You should feel a thin, but firm, film that is not sticky.
Wait and dry
Allow the product to set for 10-15 minutes at room temperature. Avoid direct heat or strong wind, as this can cause the impregnation to set too quickly and form streaks.
Once the time has passed, go over the entire boot once more with a dry cloth. This will remove any excess drops that may collect in the folds or on the sole.
Common pitfalls
– Are you spraying in cold weather? The cold will cause the liquid to solidify before it can penetrate the leather. Wait until the room is at least 15°C before you start.
– Are you using too much product? A thick layer will be sticky and can attract dirt. Remember: two thin layers are better than one thick one.
– Forgetting your laces? They are often overlooked but also get water on them. A quick spray of the laces provides complete protection.
Tips for families and children
If you have young children who run in muddy trails, do an extra check after each weekly application. A few extra seconds with the cloth can make the difference between dry and wet feet.
For dog owners, it's smart to also treat their boots after a day in the woods. The dog's paws can introduce moisture and dirt into the grooves, so a quick check saves both time and trouble.
So, once you’ve gone through all these steps, you’ll feel that calm assurance that your Samelin boots are ready for your winter adventure. You’ve added a smooth, flexible protection that lets your skin breathe but repels water – just as we at TJÅKKO recommend for anyone who wants to keep their feet dry without losing grip.
Step 4: Let the boots dry and finish.
When you have just sprayed the impregnation, the boots still feel a little sticky – and that is completely normal. What is happening now is that the small molecules need to bind to the leather fibers and harden, otherwise the protection will be weak and can lead to mold.
So, what do you actually do? Let them dry in peace and quiet, without stressing the process with heat or strong wind.
Here are some concrete tips that will make drying both faster and gentler for your full-grain leather.
Why drying is critical
If moisture remains when you throw your boots on, it creates an ideal breeding ground for mold and bad odors. Furthermore, remaining liquid can weaken the bond between the impregnation and the leather, allowing water to penetrate just as quickly as before.
Optimal drying conditions
Temperature: The room should be around 18–22 °C. Lower temperatures cause the liquid to solidify on the surface without penetrating, while higher temperatures can dry too quickly and make the leather stiff.
Air circulation: Place the boots on a rack or clean cloth to allow air to circulate around the entire shoe. Avoid placing them in a pile or in a box, where moisture will collect and dry unevenly.
Humidity: Ideally, a relative humidity of 40-60%. Too high humidity means that water vapor remains on the leather, which significantly extends the drying time.
Finishing for extra protection
When the boots feel dry to the touch, but still not completely hard, you can give them a final light wipe with a soft leather conditioner. This will fill in any micro-cracks that may have opened during the impregnation process and provide an extra protective barrier without suffocating breathability.
Just apply a thin film – remember that you already have a waterproof layer. Using too much conditioner will leave the surface shiny and can attract dirt, just like an excessive layer of wax.
Storage after drying
Once the boots are completely dry, store them in a ventilated place – preferably in a cloth bag or a box with a few sheets of newspaper in the bottom to absorb any remaining moisture. Avoid plastic bags which can create condensation and rehydrate the leather overnight.
Specific advice for families, dog owners and hunters
For families with children, it’s a good idea to let the boots dry for at least 24 hours before using them again – children’s active feet can quickly rehydrate semi-dry leather. Dog owners should dry the laces separately and give them a quick rub with a damp cloth to remove paw prints. Hunters who move in deep snow can apply a thin layer of silicone spray to the sole after drying for extra slip resistance, but only if it doesn’t affect grip on ice.
Checklist before you put them back on
Before you take your boots out into the snow, go through this quick check:
- The leather surface feels completely dry and smooth, without sticky spots.
- The conditioner has been absorbed, leaving a smooth, soft shine that you can feel with your fingertip.
- The laces are also treated and dried – a common mistake that often leads to water seeping into the seams.
- The boots are placed on a dry surface, so that any remaining moisture can evaporate without re-wetting them.
- If you're planning a longer hike, pack a small travel bottle of extra waterproofing spray for a quick touch-up on the go.
Once you’ve gone through the checklist, you’re ready to head out into the winter landscape with the confidence that your Samelin boots will keep your feet dry and your grip stable all day long. Remember that drying and finishing are just as important as the waterproofing itself – without them, all your work will basically be in vain.
step 5: maintenance and re-impregnation
Now that the boots have had their first round of waterproofing, they feel like new – but that’s just the beginning. Just like a good winter jacket, you need to care for it regularly, and so do your Samelin boots.
Have you ever felt how quickly a small amount of moisture can turn your entire day into a struggle? That's why maintenance is key to keeping leather both waterproof and breathable.
Daily check-in
After every day in the snow or rain, take a minute to inspect your boots. Feel the soles – is they still soft or has they become sticky? Wipe off any surface moisture with a dry cloth. This takes less than five seconds, but will save you from mold later.
If you're a family man who often drives the kids to school, or a dog owner with furry companions, you might want to pay extra attention to the lace loops. A quick rub of the laces with a damp cloth will remove any traces of mud and fur that might otherwise seep into the seams.
Weekly re-impregnation
For most people, every three to five weeks is just right, but here are some concrete scenarios:
- Daily hiking in deep snow: Spray a thin layer every two weeks. The thin layer absorbs quickly and prevents water from penetrating.
- Urban use with short walks: Once a month is often enough, especially if you let them dry thoroughly after each rainy day.
- Hunting or mountain expeditions: Bring a travel bottle of waterproofing spray in your backpack. A quick touch-up after every half-day session will keep the protection intact.
A practical rule of thumb I usually say is: if you can see puddles of water on the surface when you tilt the boot, it's time for a new treatment.
How to re-impregnate without overstressing the leather
1. Clean the surface lightly. Use a soft brush to brush away dust. Avoid water – a dry cloth will suffice.
2. Apply in thin layers. Hold the spray bottle about 20 cm from the leather and sweep in even motions. Remember that two light layers are better than one thick one.
3. Let dry for 10-15 minutes. Avoid direct heat, but allow air to circulate. A wire rack on the kitchen counter works well.
4. Finish with a light conditioner. A small amount of leather conditioner provides extra softness and fills in micro-cracks that can occur during winter use. Apply in a circular motion and leave to absorb for a few minutes.
It sounds like a whole ritual, but each step only takes a few minutes. And you'll quickly notice the difference: no sticky feeling, no unpleasant smell, just dry and comfortable feet.
Special tips for different user groups
Families with children: Children's feet sweat more, so let the boots dry at least 24 hours before the next day. An extra conditioner on the inside can reduce chafing.
Dog owners: After a walk in the woods, wipe the lace loops with a damp cloth and apply a drop of spray to the laces. This will prevent fur and moisture from getting in.
Hunters and hikers: Use a thin layer of silicone spray on the sole after drying for extra slip resistance – but test on a small area first so that grip on ice is not affected.
Practical checklist before you put them back on
- The joint surface feels dry and smooth, without sticky spots.
- The conditioner has been absorbed, leaving a soft shine.
- The laces are dry and free of dirt.
- The boots are placed on a dry surface so that any remaining moisture can evaporate.
- Pack a travel bottle of extra waterproofing spray for long trips.
By following this routine, your boots will be just as reliable year after year. We’ve seen how a group of hiking enthusiasts in Dalarna managed to extend the life of their Samelin boots with just one extra round of re-impregnation before each weekend outing.
If you want to see the full range of winter boots built for this maintenance, check out Warm-lined winter boots from Samelin – TJÅKKO for more ideas.
conclusion
So there you have the entire process – from cleaning to re-impregnation – combined in one simple flow.
Remember, patience is key: let each layer dry thoroughly before moving on. A quickly overcoated leather quickly becomes sticky and attracts dirt, as we've all learned from our winter rides.
Wherever you are – in the mountains, on a city walk or with the kids in the schoolyard – the same principle applies: cleanse, apply thin layers, let dry and finish with a light conditioner.
Have you ever noticed that your boots feel stiff after a rainy day? Then it's a clear sign that you missed the drying step or used too much product. A quick check with your finger will give you the answers.
If you want to keep your Samelin boots in tip-top condition all season long, build a checklist routine into your weekly schedule. We’ve seen how a simple reminder on your phone saves both time and damp feet.
So, what's your next step? Get out your soft brush, spray a thin layer and let your boots rest in the cool winter room. You'll notice the difference the next time you head out into the snow.
If you need more tips or a reminder about when to re-impregnate, please check out our other guides on the TJÅKKO website. Good luck with your winter adventures!
FAQ
How often should I waterproof my leather boots for winter without a membrane?
We recommend a light re-coat every three to five weeks if you’re out in wet snow every day. For urban use, once a month is enough. The key is to keep an eye on how the surface feels – if it gets a little soft or you see puddles when you tilt your boot, it’s time for a new coat. A quick schedule on your phone will help you remember.
Can I use regular wax spray on my winter boots?
Regular wax is often too thick for full grain leather and can stiffen the leather. We prefer a wax-based spray that is specially formulated for winter use, it provides a thin but durable protection without blocking breathing. Apply in thin layers and let each layer dry thoroughly. If you still want to try a regular wax, do a test on a small area first and feel how the leather reacts after 15 minutes.
Do I have to dry at room temperature or can I do it in a warm room?
Yes, you can leave the boots in a warm room, but avoid direct heat from radiators or hair dryers. The ideal temperature is 18–22 °C and good air circulation. A wire rack or a clean household cloth allows air to move around the entire shoe. This way, the impregnation penetrates the fibers without the surface drying too quickly and becoming brittle. It only takes a few hours, and you can check with your fingertip that the surface feels smooth before you use them again.
What do I do if my boots become sticky after impregnation?
If your boots feel sticky after spraying, you have likely used too much product or let it set too quickly. Take a clean, dry cloth and gently wipe away the excess. If the surface is still tacky, do a quick reapplication with a very thin layer and let it dry for at least 15 minutes at room temperature. Afterwards, they should feel dry and flexible.
Can I waterproof without taking off my shoes?
You can actually waterproof without taking the shoes off, but it's smarter to first remove the insole and any insoles. This gives you better access to the entire leather surface and prevents moisture from getting trapped under the sole. If you prefer to leave the shoes on, make sure they are completely dry and place them on a rack so air can circulate around both the upper and footbed.
How do I know that the impregnation has set properly?
You will know that the impregnation has set when you feel a thin, even film on the leather that is not sticky. Try the finger test: press lightly with your fingertip on an area that looks dry. If you feel a slight resistance but no sticky surface, the product has bonded properly. Another indicator is that water droplets run off in beads instead of soaking into the material.
Is there any advantage to doing the impregnation at home compared to a shoe store?
Doing the impregnation at home gives you full control over the products and quantities, and you save both time and money compared to a shoe store. Plus, you can adapt the process to your specific conditions – for example, if you live in a humid coastal climate or in the mountains. If you still prefer professional help, choose a store that uses the same wax-based sprays that we recommend, so you get the same results.