


You've probably stood there, with a new leather shoe in your hand, wondering how to keep it fresh when you throw yourself out into the snow and rain.
It's a bit like giving a favorite jacket a waterproof coat – you don't want it to lose its breathability, but still keep moisture out. That's why waterproofing leather is so important for anyone who lives actively outdoors.
Take a winter hike in the mountains, for example. After hours in wet snow, you'll notice your feet starting to sweat and water seeping into the insoles of your shoes. A pair of properly waterproofed leather shoes can prevent this and let you focus on the view instead of cold, wet feet.
Another everyday situation: your child's new leather shoes that get wet on the playground. Instead of watching them become discolored and stiff, a quick treatment with a water-based impregnation can restore both protection and softness.
So, how do you do it? Here are three concrete steps you can follow today:
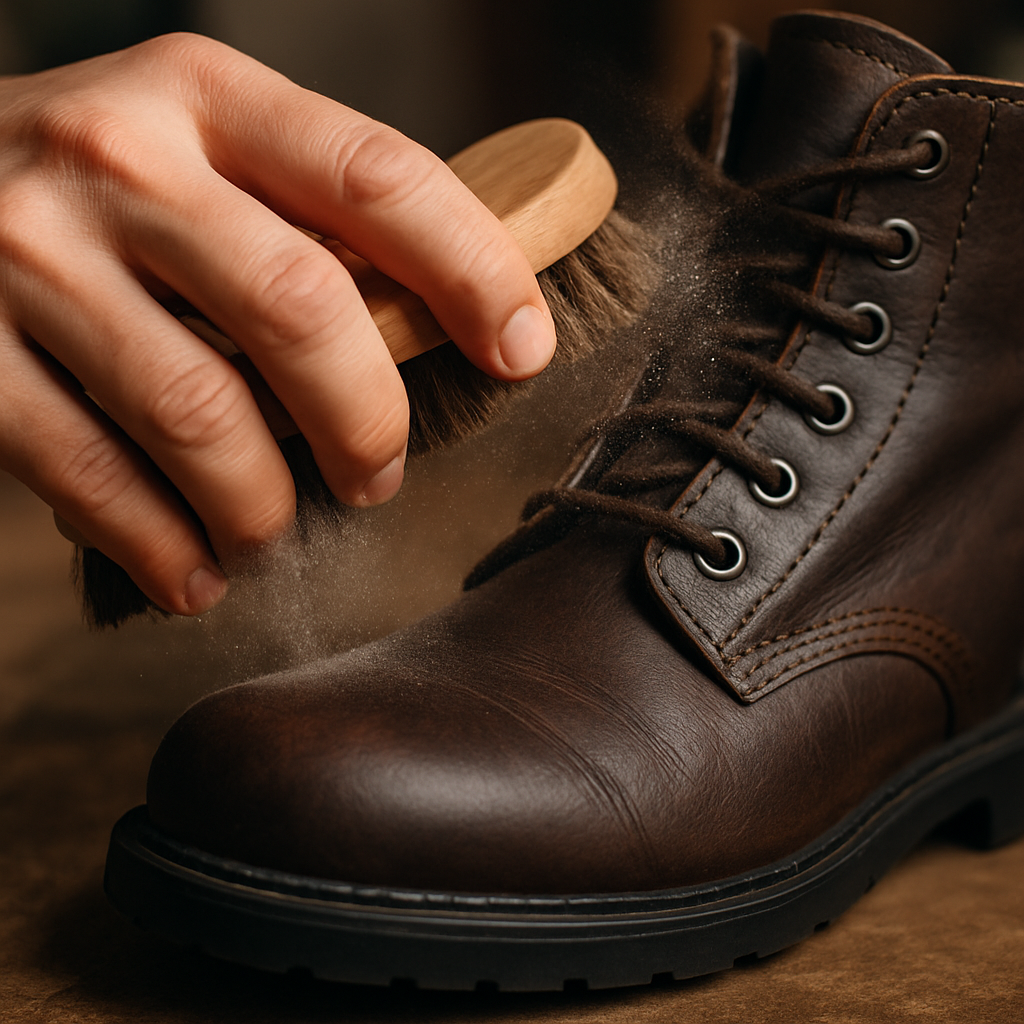
- Clean the surface with a soft brush and let the shoes dry naturally – no heat, no dryer.
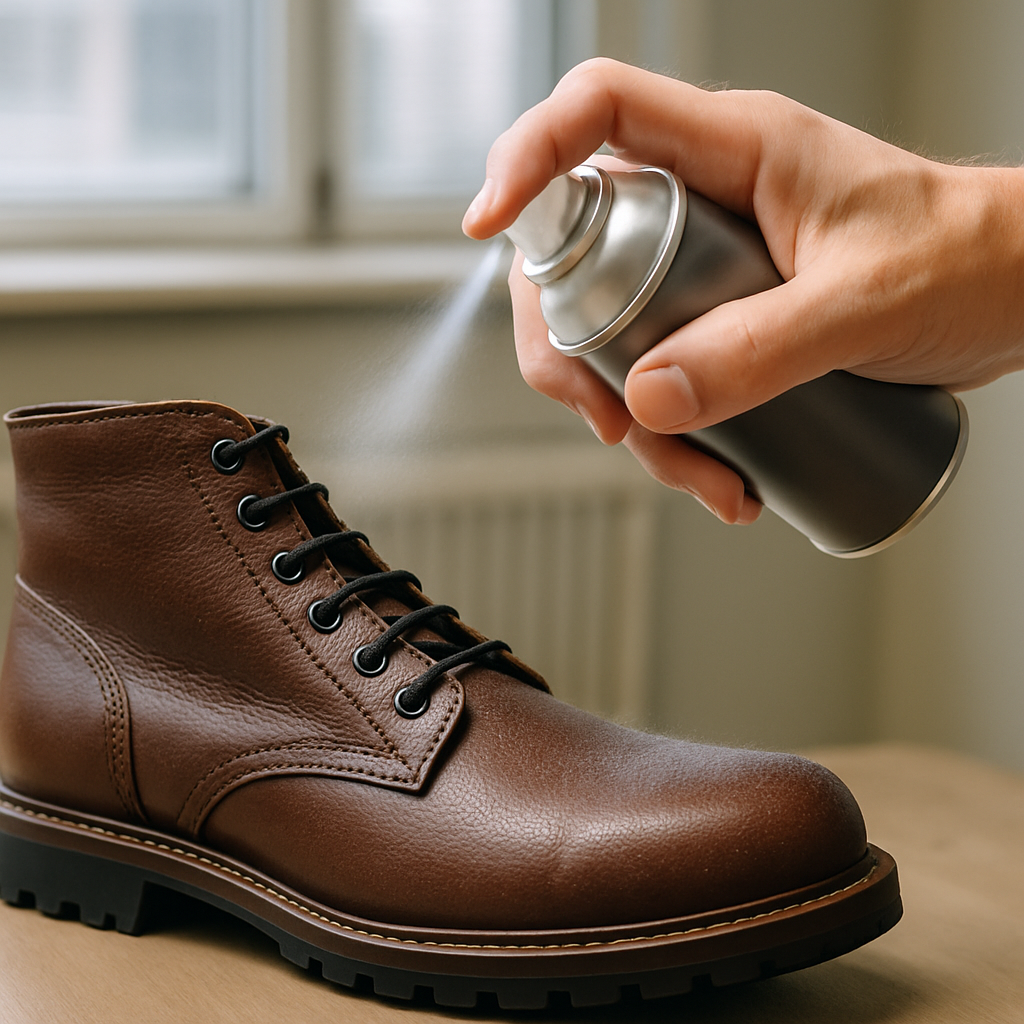
- Apply an even amount of waterproofing spray or cream. A small amount goes a long way, spray or rub in in circular motions.
- Let the shoes rest for at least an hour before using them again, preferably in a ventilated room.
It may sound like a small routine, but the results are huge: longer life, fewer repairs and a feeling that you are really taking care of your equipment.
If you are looking for a reliable product choice, ECO Proofer | Water-based Impregnation – TJÅKKO has been developed specifically for leather, suede and other technical materials. It is environmentally friendly, breathable and provides invisible protection that lasts for months.
And you know what? Many of our customers report that their shoes feel drier after the first application – perfect for both long mountain hikes and short city walks.
So, next time you pack your backpack, bring a bottle of waterproofing and let your leather shoes be as ready for adventure as you are.
TL;DR
With a simple cleaning, a small amount of water-based impregnation and an hour of rest, you can transform wet, stiff leather shoes into dry, soft companions that can handle both snow tracks and playgrounds without losing their breathability. Follow our three steps for quickly impregnating leather and you'll enjoy longer life, fewer repairs and comfortable feet all season long – so you can focus on the adventure instead of wet feet.
Step 1: Prepare the leather before impregnation
Do you know the feeling when you've just bought a pair of new leather shoes and then notice that they're covered in dust, mud or old footprints? Before you even think about waterproofing, the first step is to give the surface proper preparation - otherwise the protection will just be a fine layer of air.
Start with a soft brush or a clean toothbrush. Rub gently in circular motions to loosen dirt without scratching the leather. If you see stubborn stains, lightly dampen a cloth with lukewarm water and wipe gently – you want to avoid soaking the shoes.
Once you have removed all visible debris, go through the entire shoe and look for small cracks or dry edges. Such areas absorb moisture more quickly and can cause the impregnation to be uneven. A quick check with your fingertips – pressing gently – is enough to feel for tension in the material.
So, what happens if you skip this part? You risk the impregnation getting entangled in the dirt and, in the worst case, your shoes becoming even stiffer than before.
Let the shoes dry naturally in a well-ventilated room, preferably at room temperature. Avoid direct sunlight, tumble dryers or radiators – heat can shrink the leather and make it brittle. An hour or two is often enough, but if you have the opportunity, leave them overnight for best results.
If you have time, apply a thin layer of natural shoe wax after the surface is dry. The wax fills in micro-cracks and creates a base that allows the water-based impregnation to adhere better. But remember – too much wax can hinder breathability, so use it sparingly.
When you see that the leather feels evenly dry and no longer leaves fingerprints, it's time to move on to the impregnation itself. If any part still feels damp, let it air out a little longer - better preparation means longer protection.
To get an even and durable result, we recommend ECO Proofer | Water-based Impregnation – TJÅKKO , which is specially formulated for leather and allows the material to breathe.
If you want to read more about how professional brands build their brand around quality, check out Authority Echo for inspiring case studies.
Here is a visual summary of the key preparation steps.
A common mistake is to use harsh detergents or alcohol, which can dry out the leather and reduce its ability to absorb the impregnation. Instead, choose a mild soap-free cleaning cream or a special leather cleaner that is pH neutral. Always test on a small, hidden area first – this will help you detect any color changes before working on the entire shoe. Once you are sure the surface is clean and dry, proceed with the protective product described above.
Doing this once a season saves both time and money, and your feet will thank you with fewer blisters.
Remember that a well-prepared surface is the foundation for the impregnation to last for months, whether you're hiking in the mountains or playing in the snow. Make this a routine every season and you'll be rewarded with dry, flexible shoes that breathe as well as your feet.
Step 2: Choose the right impregnation product
You've just let your shoes rest after moisturizing and now that little doubt is starting to creep in: which product should I actually use? It's completely normal – there are so many options that it's easy to feel lost.
So, what should you really look for? Well, we want a product that provides waterproof protection without suffocating the leather, that breathes as well as your skin and doesn't leave a sticky film. We also want it to be easy to apply and last for months.
Type of leather – what matters?
Different types of leather react differently to impregnation. An open, aniline leather absorbs liquid easily and needs a stronger hydrophobic coating, while a colored cowhide leather already has a certain protective film. Gusti Leather explains that hydrophobic treatments make the leather waterproof without destroying its natural structure.
Spray or cream – which one feels right?
Spray is fast and gets into hard-to-reach corners, but it can sometimes leave a thin film that feels “plasticky.” Cream, on the other hand, allows you to rub the product in in circular motions, which gives a more even distribution and more control over the amount. If you prefer the feeling of “massaging” the protection, go for cream; if you want a quick fix, choose spray.
Another important aspect is whether the product is water-based or solvent-based. Water-based options, such as our own ECO Proofer, allow the leather to breathe and are kinder to the environment. Solvent-based sprays often provide stronger water repellency but can dry out the leather if used too often.
If you want to keep both your feet and the planet happy, look for a product that's labeled "eco-friendly" or "biodegradable." Many of them are also tested to leave no harmful residue in the air—a nice bonus for indoor use.
Before applying any product, make sure the surface is completely dry and free of old wax or previous impregnation. Autodude describes how a cleaner and protectant in their package helps remove stubborn dirt and provides an optimal base for the next step.
Checklist for choosing the right product
- Identify leather type – clear vs. colored.
- Decide whether you prefer spray or cream.
- Choose water-based for breathability and environmental considerations.
- Check that the product is tested for long-term water repellency.
- Make sure it leaves a thin, invisible film without a sticky feeling.
Finally, test the product on a small, hidden area first. You don't want the entire shoe to turn red if the paint reacts unexpectedly. A quick test on the sole or insole is usually enough to prove that everything is working properly.
Once you’ve found the right waterproofing product, you’re ready to move on to the actual application. It’s almost like giving your shoes a little rain jacket that they can breathe in – you get both protection and comfort without compromising.
Remember that even the best waterproofing loses its effectiveness over time. For everyday use in an urban environment, a treatment every six months is sufficient, but if you are out in the mountains and rain every weekend, you may need to refresh every month. Store your shoes in a cool, dry place so that the existing protective film can withstand the moisture in the air.
If you follow this checklist and test on a hidden spot, you will soon notice the difference – the water beads up and your shoes still feel soft. So get started, choose a product that matches your leather and your lifestyle, and let your feet enjoy both protection and freedom of movement.
Step 3: Application technique – watch the video
Now that you've chosen the right product, it's time to actually get it on the surface. I know, you might be thinking "but how do I do that without making a mess?" Let me walk you through each step so you can follow along without having to guess.
Prepare the workplace
Place the shoes on a clean, dry surface – preferably on an old newspaper or a plastic tray to prevent spills from getting on the floor. Make sure the room is well ventilated; a light stream of air will help the solvents in the spray evaporate faster and reduce odor.
If you are using a cream, have a soft cloth or small shoe brush within reach. A small bowl with some cream will prevent you from spilling product on the floor.
Spray: technology for even coverage
Shake the bottle for 10 seconds – it sounds simple but it will evenly distribute the active ingredients. Hold the spray can about 20-30 cm from the surface and spray with a short, even spray. Avoid long jets which can collect too much liquid in one place.
Make two intersecting passes: first horizontally, then vertically. This will create a network of thin layers that will dry without forming drops. Let each layer dry for 5–10 minutes before moving on – you will quickly notice that the water beads off naturally.
Cream: massage in for control
Take a small amount of cream on the thread – about the size of a pea. Blend in in circular motions, starting at the edge and working your way in. It feels a bit like spreading on a sandwich: you want a thin, even layer that penetrates the pores without becoming sticky.
Pay extra attention to seams, seams and areas where the leather is particularly worn. These are the areas most susceptible to water ingress. A short 2-minute break between each section will allow the material to absorb the cream properly.
Check the result
A simple test is to drop a few drops of water on a hidden part of the shoe and see how the water reacts. If it beads up and runs off, you're done. If the water seeps in, give it an extra thin coat and let it dry.
Remember that over-application can make the leather stiff. It is better to apply two thin coats than one thick one.
Examples from the field
Maria, a hiking enthusiast from Dalarna, said she first sprayed her new hiking boots with a regular water-repellent spray and got a sticky surface. After following this technique with two intersecting passes and a 10-minute drying time, she noticed that the shoes still breathed but kept her feet dry for two weeks on a rainy mountain hike.
Johan, who often uses his children's shoes in muddy playgrounds, prefers the cream. He massages in a thin layer every month and says the shoe never gets hard, and the water bounces off immediately after each play session.
Tips from the experts
– Avoid applying in direct sunlight. UV radiation can cause the film’s adhesive to cure too quickly, resulting in an uneven surface.
– Use a timer. It's easy to get confused when you have multiple steps and then you can miss the drying time.
– For really tough conditions, combine spray and cream: first a thin spray to reach all corners, then a cream on critical seams.
For a complete line of products including both sprays and creams, as well as extra protection for your barefoot shoes, check out our foot care collection . All of our products are designed to breathe and keep the leather flexible.
Step 4: Finishing and drying time
Now you’re done with the actual application and it’s time for the perhaps least glamorous, but absolutely crucial part – letting the material rest. I know, standing and staring at a shoe in a corner feels like waiting for a fire to go out, but the right aftercare is what makes your impregnation really stick.
Why drying time makes a difference
The impregnation agent needs time to bond to the leather fibers. When you let in too much air or heat too soon, the film can become shallow and patchy. It’s like trying to dry a painting with a fan – you get a thin surface but it lacks depth.
A common rule of thumb is to let your shoes sit for at least 8-12 hours before wearing them again. This allows the water-repellent polymer to fully polymerize and provides a smooth, flexible surface that is still breathable.
Step by step: optimal finishing
1. Place the shoes on a ventilated surface – a shelf in a room with a window open on a wedge or a dry closet. Avoid direct sunlight; UV radiation can break down some adhesives and create a hard surface.
2. Use a timer – set 10 minutes for each layer you apply and note the total time. Once you’ve reached 8-12 hours, go back and feel the surface with your fingertips. It should feel soft but not sticky.
3. Turn the shoes over once – halfway through the drying time, turn them over so that both the upper and the sole get equal air circulation. This is especially important if you have used sprays that tend to collect more liquid on the upper.
4. Avoid heat sources – no dryers, no radiators and no hair dryers. If you are tempted to speed up the process, try air circulation with a fan on low speed instead, but keep the distance so that the air just passes by, not blows directly on the shoe.
5. Check the result – drop a few drops of water on a hidden part of the shoe. If the water beads up and runs off in a few seconds, you’re done. If it seeps in, leave the shoes for another couple of hours and repeat the test.
Examples from the field
Anna, a mother from Värmland, said that she had previously let her children's shoes dry on a fan heater and then noticed that they became stiff after a few days. When she started following the advice above, with 10 hours of natural drying in a shaded hall, she noticed that the shoes retained their softness and the water still beaded up.
Erik, a mountaineer who often works at high altitudes, has tried letting his thick hiking boots dry in a ventilated storage room overnight. He says the extra hour of rest after a cold morning reduces the risk of cracks when he then rides on steep passes.
Tips for special conditions
- Damp winter: place a clean kitchen towel in the insole to absorb any residual moisture without using heat.
- A lot of dust: dry the shoes in a room with an air filter or a small air purifier to prevent dust particles from settling on the fresh film.
- Faster drying in mild climates: place the shoes on a rack so air can circulate around the entire shoe.
Quick comparison table
| Factor | Recommended method | Why |
|---|---|---|
| Drying time | 8–12 hours in the shade | Provides full polymerization and flexibility |
| Air circulation | Ventilated room, turn shoes halfway | Prevents uneven drying and sticky spots |
| Temperature | No direct heat, max 20 °C | Prevents adhesives from hardening too quickly |
Remember that every shoe is unique, so listen to the material’s cues and adjust the drying time as needed. With these simple steps, your waterproofing will last and you can focus on your next adventure without worrying about wet feet.
Step 5: Common mistakes and how to avoid them
You've just gone through cleaning, product selection, and application. But so many of us fall into the same trap – one small mistake that can ruin the entire impregnation.
1. Using heat to speed up drying
It's tempting to put your shoes near a radiator or in a dryer when you're hungry to get out and walk. But heat causes the binders in the impregnation spray to set too quickly, causing the surface to become hard and crack.
A better trick is to let the shoes rest in a ventilated room for 8-12 hours, preferably with a small fan on low speed. This gives the film time to polymerize without becoming brittle.
2. Applying too much product
I've seen colleagues pour an entire bottle on a shoe – the result is sticky, breathability is lost and water seeps in anyway.
Just take a pea-sized amount at a time and massage it in using circular motions. Two thin layers are always better than one thick one.
3. Skipping tests on a hidden surface
It's tempting to think that all products behave the same on every type of leather. However, a dyed leather shoe may react differently than a raw aniline leather.
Always do a small test on the inside of the sole or on an invisible edge. If the color changes or the surface becomes shiny, wait and dry a little longer before continuing.
4. Ignoring seams and edging materials
The seams are like the nervous system of the shoe – they absorb the most water. Many people forget to give them extra protection, so water penetrates right there.
Spray or rub an extra thin layer onto each seam and the edge of the leather trim. It only takes a few seconds but makes the entire shoe more water resistant.
5. Storing shoes in a humid environment
After a long hike, your shoes may still be a little damp. Putting them in a plastic bag or a cramped cupboard will allow the moisture to re-enter the material.
Let them dry completely, place them on a shoe block or newspaper, and store them in a cool, dry cupboard with some air circulation.
6. Using the wrong type of impregnation on suede or nubuck
Suede is more delicate than smooth leather and requires a special spray that doesn't leave a thick film. If you use the same water-based product as for leather shoes, you risk darkening the color and making the surface dull.
A quick look at a guide for suede shoe care will show you exactly which products are safe for that structure.
So, what can you do right now? Go through your checklist and mark off any steps you may have missed. A little reminder in the form of a post-it on your workbench can save the next round of impregnation.
7. Forgetting about regular maintenance
Waterproofing isn’t a “do it once and forget it” thing, so plan on a quick top-up every six months for daily use, or monthly if you’re often in the rain.
An easy way is to keep a small bottle in your backpack and give your shoes a light touch before putting them in the shoebox. This way the protection stays fresh and you don't have to do any major rework.
And remember, minor maintenance is often cheaper than replacing the entire shoe.
Finally, remember that every mistake is a learning opportunity. Once you avoid these common pitfalls, your leather shoes will last longer, breathe better, and keep your feet dry—whether you’re in the mountains or on the playground.
Step 6: Maintenance and re-impregnation
After you've gone through the first five steps, it sometimes feels like you've done it all – but the truth is, leather is a bit like an old friend that needs a little love every now and then.
Why regular maintenance?
You’ve probably noticed that a layer of waterproofing wears off faster when you’re out in the rain or snow. So it’s not a “put it on and forget it” thing. A fresh layer keeps the water out, but also keeps the leather supple and breathable.
According to Skechers' guide , you should re-impregnate leather shoes at least once a month during wet seasons, and every six months when you use them most in drier conditions.
How often is enough?
The best tip is to let your own schedule dictate the pace. Do you feel like the water is no longer bubbling? That's the signal to give it a new touch. Or you can set a simple reminder on your phone – every time you put away your hiking boots after a day in the woods.
If you have your child's shoes in your backpack on a trip, bring a small bottle and give them a quick "puff" before packing them back up. This will prevent dirt from building up and save you from major repairs later.
Quick maintenance tips for everyday life
1. Mini spray in your pocket – a thin mist of water-based impregnation is enough to refresh the cover. Hold the bottle upright so you only get a couple of drops.
2. Shoehorn + towel – place a dry kitchen towel in the insole to absorb moisture that may have accumulated during the day.
3. Check the seams – they are the most vulnerable. Give them an extra bead with a small cotton swab dipped in the impregnation.
Re-impregnation after harsh conditions
Have you just come home from a day in muddy trails or a snowstorm? Then it's time for a slightly more extensive round. Start by removing all visible dirt with a soft brush. Then, if the leather feels dry, give it a brief moisturizing with a natural leather wax - Roselli leather wax is made from pure tar oil and provides both shine and protection Roselli leather wax .
Apply the wax in thin circular motions, let it sink in for two minutes, then wipe off the excess. When the surface feels smooth, spray a thin layer of your regular waterproofing spray and let the shoes rest in a ventilated room for 8–10 hours.
Re-impregnation checklist
- Clean the surface – no dust, no mud.
- Make sure the leather is dry (at least 30 minutes).
- Give a quick moisturizer if it feels dry.
- Apply thin impregnation – preferably in two coats.
- Let dry in the shade, without direct heat.
- Test with a few drops of water; do they bead?
And don't forget to enjoy the process. It's actually a bit like giving your feet a spa treatment – you'll see and feel the difference right away.
In summary: schedule regular maintenance, always keep a small bottle handy, and when the weather gets really rough, give your leather shoes an extra dose of natural wax and impregnation. This way, they maintain both protection and breathability, and you can keep exploring without worrying about wet feet.
One last tip: after you've let your shoes rest, place a shoehorn in each shoe. This will keep their shape and ensure the waterproofing is evenly distributed the next time you use them. So, next time you pack your backpack, remember that both protection and shape are equally important.
FAQ
How often should I impregnate my leather shoes?
It depends on how much moisture you expose your shoes to. For a regular everyday hiking shoe, a new treatment every six months is sufficient during dry months, but if you often walk in rain or snow, you should refresh every month. An easy way is to keep a small spray bottle in your backpack and give a thin mist after each day in wet weather. This way the leather will retain its breathability and water repellency without you needing a big treatment every two weeks.
Can I use water-based impregnation on suede?
Suede is more sensitive than smooth leather, so you need to choose a product specifically formulated for nubuck or suede. Water-based sprays labeled “for suede” penetrate without darkening the surface and leave a thin, breathable film. Apply in thin layers and let each layer dry in the shade – otherwise the surface will become sticky. Test on a small, hidden area first to avoid unexpected discoloration.
Does waterproofing work on old, worn shoes?
Yes, you can give even an old boot a life-time boost, but expect the result to be less shiny than a new shoe. Start by cleaning off any dirt and any old wax residue. If the leather feels hard, give it a quick soak with a natural shoe wax before spraying. After two thin coats, you’ll have a protective film that restores some water repellency, but you should plan on more frequent maintenance – maybe every two months if you use the shoes in harsh weather.
Do I need to dry the shoes in a special room after impregnation?
A ventilated, shaded area is best – not in direct sunlight or a hot radiator. Leave the shoes on a rack to allow air to circulate around the entire shoe, and turn them halfway through the drying time for even drying. A general rule of thumb is to give them 8–12 hours before putting them back on; any less time can cause the film to become shallow and patchy. A gentle fan on low speed can help without heating the material.
What is the difference between spray and cream when it comes to impregnation?
Spray gives quick, even coverage and is handy when you have a lot of hard-to-reach corners, but it can sometimes form a thin, plastic film if you apply too much. Cream lets you massage the product in, so you can feel it absorb and avoid sticky spots. For a casual shoe that you wear frequently, a combination is often ideal – spray first for basic protection, then a little cream on the seams for extra durability.
Can I do a quick touch-up while I'm on tour?
Absolutely, a mini spray in your pocket is enough to give you a fresh coat before you settle down at camp. Hold the bottle upright so that just a few drops come off, spray lightly on the shoe and let it air dry for 10-15 minutes. It’s not a complete waterproofing, but it will prevent water from getting in during the short period you’re out. Feel free to pack a small towel in the insole for extra moisture absorption if you’ve been walking in deep water.
Conclusion
There have been quite a few steps, but if you follow them, it will feel like you have just given your leather shoes a little protection- and breathability-packed spa.
You've cleansed, moisturized, chosen the right product, applied thin layers, and let them sit for 8-12 hours. The result? The water beads off, the leather retains its softness, and you don't have to worry about wet feet.
So, what do you do now? Maybe you take out the little bottle in your backpack and give your boots a quick touch-up before heading out on your next rainy hike.
A simple reminder to keep in mind is that every time you let your shoes rest in a ventilated corner, you give the polymer a chance to bond properly – and then the protection becomes both durable and invisible.
If you want to keep this routine alive, write a reminder on your phone or put a post-it on your shoe rack. That way, maintenance will become as natural as tying your shoes every morning.
Finally, remember that waterproofing leather isn’t just about keeping water out – it’s about preserving that soft feel that makes you want to go further, day after day. So next time you pack for an adventure, give your shoes the care they deserve and let them follow you wherever the road takes you.